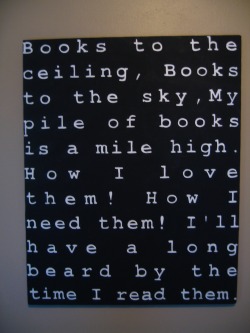
DIY "Word" Canvas
Tools:
Canvas (24"x30")
Black acrylic craft paint (Plaid Brand)
Transfer Paper (Saral Brand)
Tape
Sharpie Pen
Assortment of brushes
Access to computer software for text layout (Illustrator, Photoshop, Word, etc)
Access to an oversized printer (Kinkos has them)
USB flash drive or cd with your text layout on it.
Steps:
1.Find or make up a quote for your space. I used a quote by children's author, Arnold Lobel.
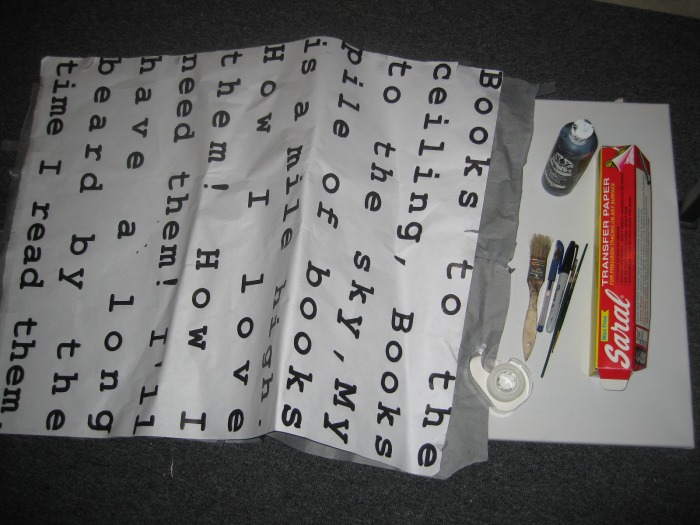
2. Use a word processing program such as Word or even Photoshop or Illustrator to lay out the text. I used Photoshop and the font "Courier New" and spaced everything out so the right and left margins were justified. Use black text on a white background.
3. Once you are satisfied with the layout, save your document to a flash drive or cd.
4. Visit your local Kinkos or any copy shop that has an oversized black & white printer. These are the printers that are usually used for architectural plans. Have them enlarge your document to the size of your canvas. In my case, it was 24" x 36". The cost to print a copy of that size was only $3.75.
5. Use transfer paper to cover the entire canvas. You may have to use a few pieces. Be sure the "transfer side" is face down on the canvas. Tape in place.
6. Lay your oversized copy on top of the transfer paper and canvas (words facing up). Be sure it's aligned with the canvas and not crooked. Tape in place.
7. Use a ball point pen and carefully trace over the words. I used a blue pen so I could clearly see what areas I had gone over. Use enough pressure so the words will be transferred to the canvas. After a while, your hand may hurt so take a break!
8. When you have finished tracing over all of the words, remove the enlarged copy and transfer paper.
9. The letters should now be visible on the canvas.
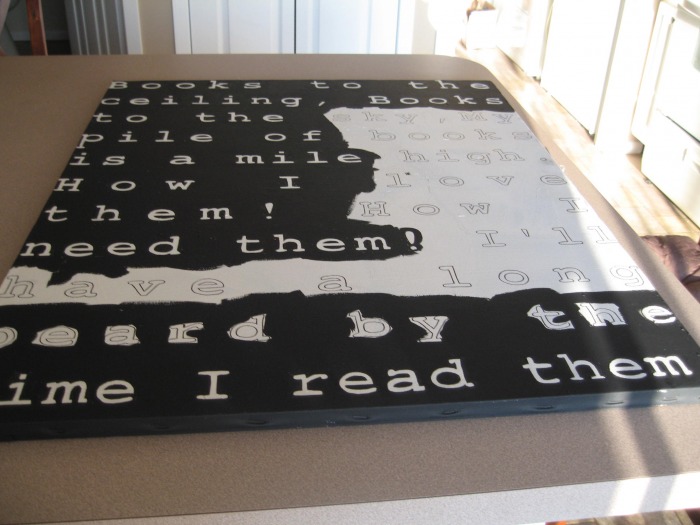
10. Use a fine tip permanent marker (Sharpie) and carefully trace around all of the letters. I did this so I wouldn't have to paint along the edges of the letters. I used a black sharpie because I was painting a black background. Match your background color to your sharpie (or other fine-tip permanent marker).
11. After you have traced around the letters, paint in the negative space between the letters (background).
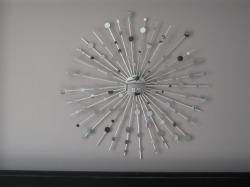
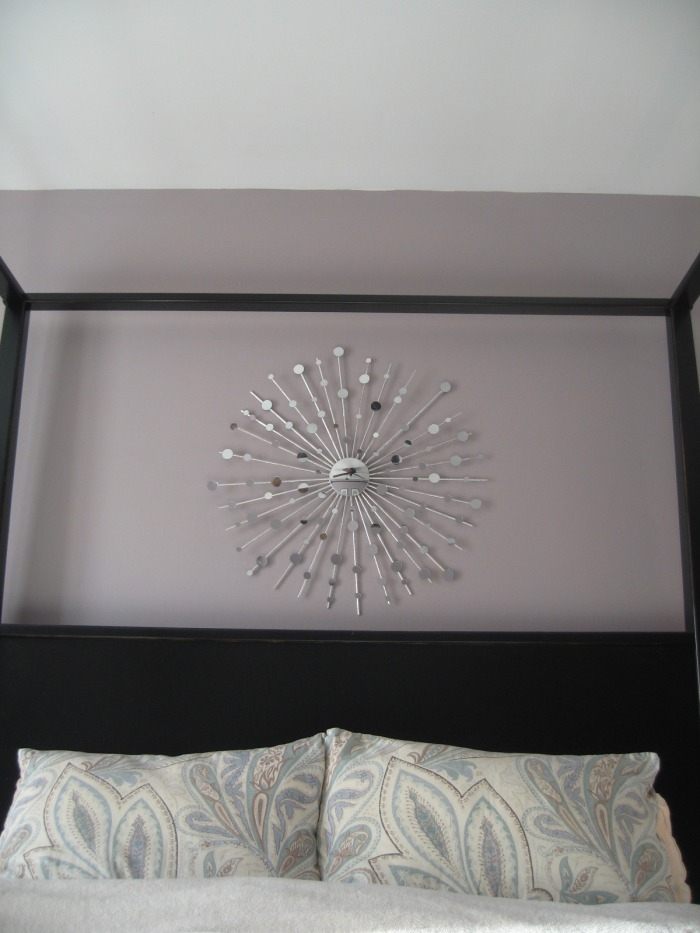
DIY Starburst Mirror
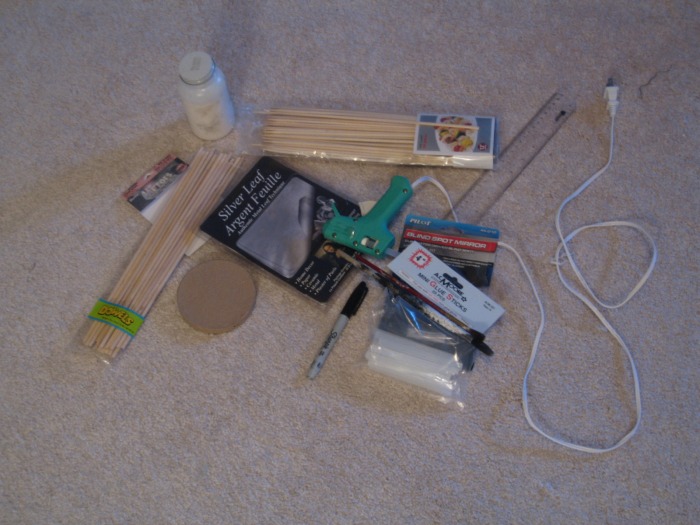
TOOLS:
1 convex mirror (sold at automotive stores as a blind-spot mirror)
1 cardboard disc the same size as the convex mirror (about 1/2" thick). A wooden disc could work as well.
12" dowel rods
12" skewers
Permanent marker
Mounting hardware
Ruler
Silver-leaf water-based gold-leaf
Sizing brushes
Hot glue
Round mosaic mirrors in 3 sizes (100 mirrors in total)
STEPS:
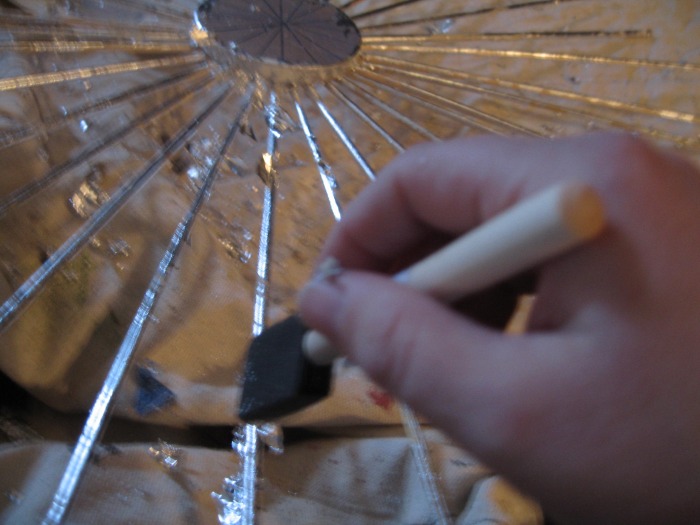
1. First, the plastic around the convex mirror had to be removed. It was held in place with glue but was able to be removed with steam.
2. Next, I found the center of the cardboard disc and used a permanent marker to divide the disc into 16 equal segments with a ruler (like a pizza).
3. Then I hot-glued the dowel rods directly on the lines so the dowels would be evenly spaced and radiate out from the disc. I then added a wooden skewer in between the dowels for variety.
4. After everything was glued in place, I brushed on a water-based gold-leaf sizing and let it sit until tacky (about 30 minutes).
5. After it was tacky, I took 1 sheet of silver leaf at a time and began to cover the dowels, skewers and center with it. I used a brush to adhere the silver leaf to the sizing and brushed away any excess.
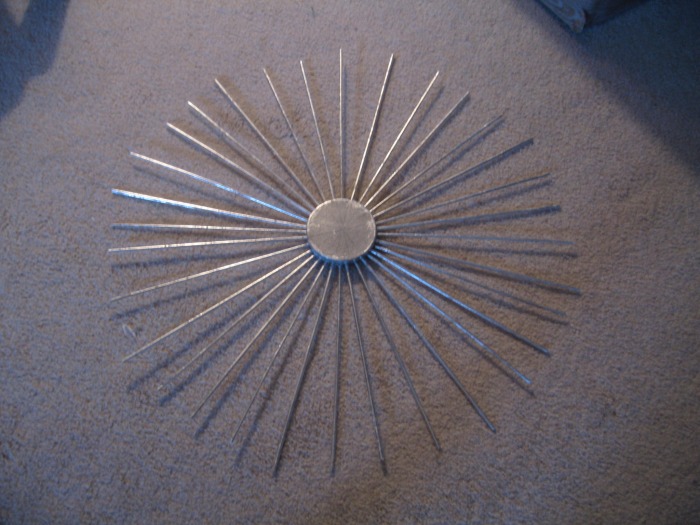
6. After everything was silver leafed, I used hot glue to adhere the convex mirror on top of the smooth side of the center disc. (The dowels were glued to the back).
7. I then randomly hot glued the small round mirrors to the skewers and dowels (approx. 3 mirrors per "arm").
8. Mounting hardware was then hot glued to the finished mirror.
Click on the thumbnails below to enlarge


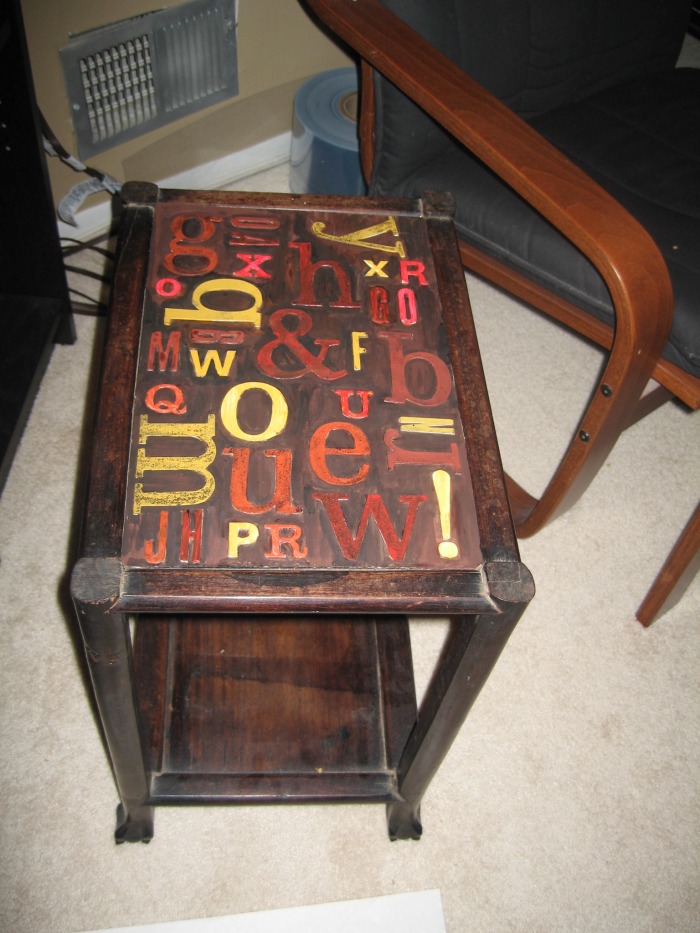
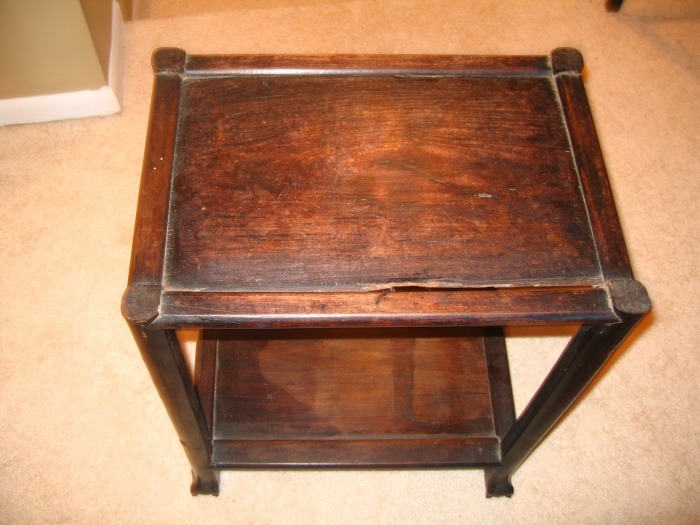
DIY Library Table
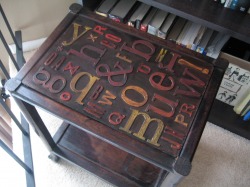
1. I got chipboard craft letters at the craft store. I looked for simple block type letters. The biggest ones were actually glitter letters, lol.
2. I picked 4 colors and randomly painted letters. I wasn't sure how many I would need so I just estimated. I also knew the paint might not stick too well at this stage and wasn't concerned with covering every bit of the letters.
3. I cut a piece of chipboard the size of the inset and laid the letters out.
4. I traced around the letters, took them off, then painted the chipboard blackish brown (using craft paint) When it was dry I glued the letters on with elmers.
5. I sealed the letters and chipboard with a water based polyeurathane and let thoroughly dry.
6. I applied a bit of burnt umber oil paint (from a tube) with a brush. I applied it in the crevices, the wiped away the excess with a rag as well as dry-brushed over the raised areas to antique it.
7. Added plexiglass. This whole thing was laid on top of the existing top. It would not be stable enough without the base. It also does need a glass or plexiglass top to protect it.
Click on the thumbnails below to enlarge.


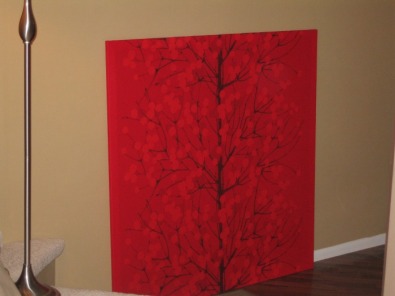
Fabric Canvas
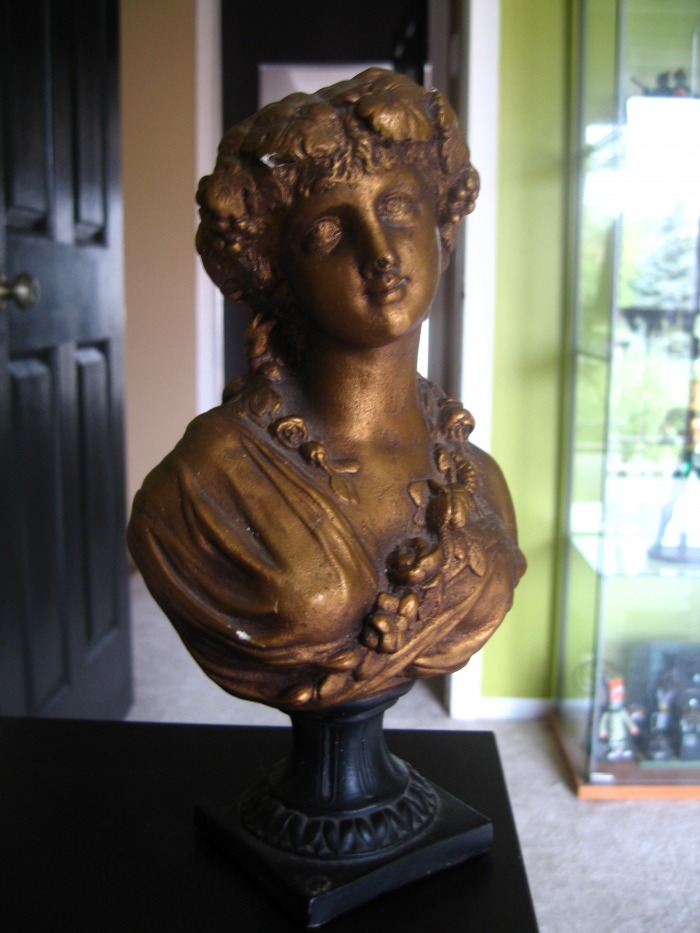
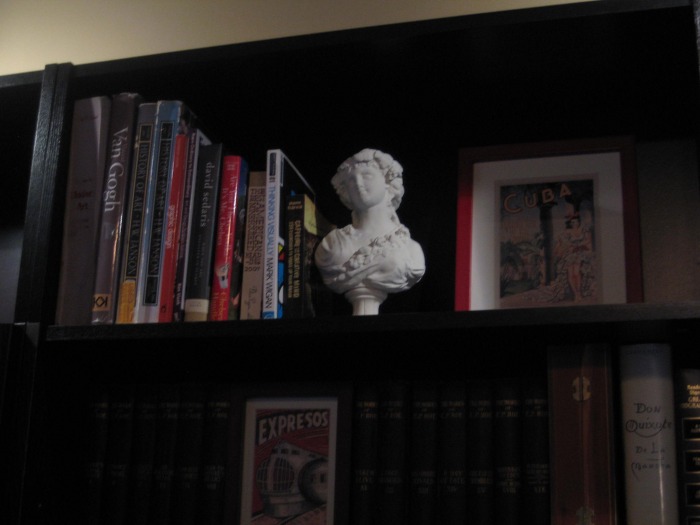
Portrait Bust before and after: (Click on thumbnails to enlarge)

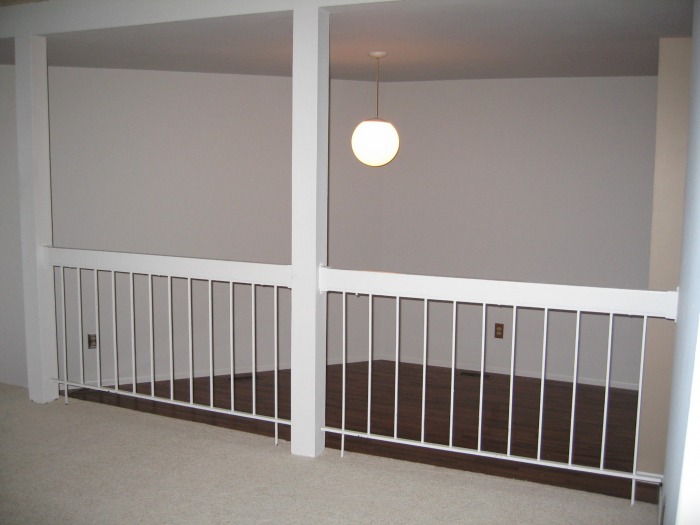
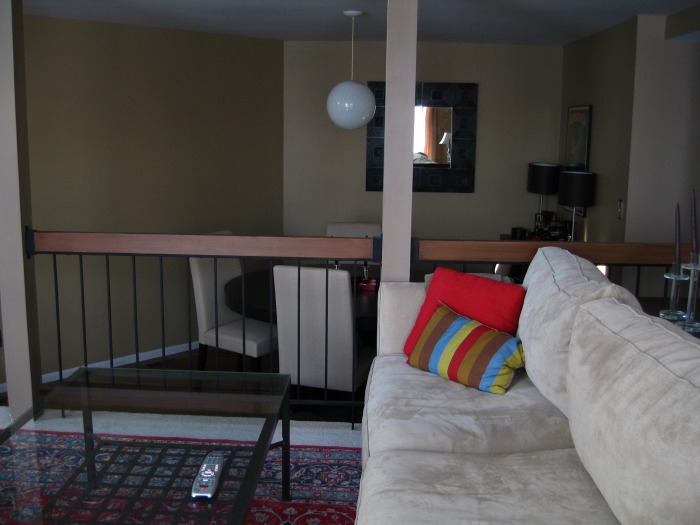
Railings Before and After: (Click on thumbnails to enlarge)
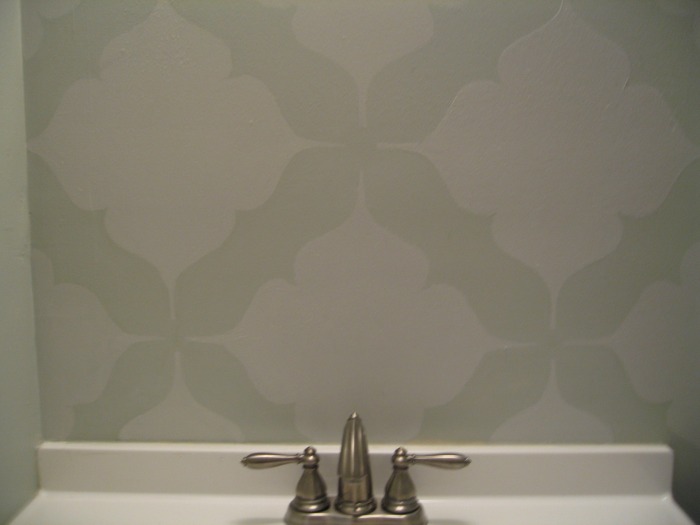
Powder Room Tone-on-Tone Stencil
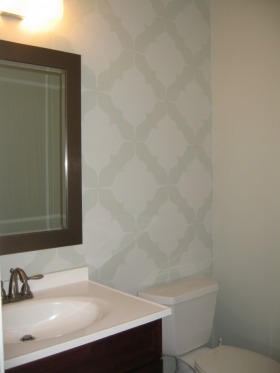
First, I should say that I found this online which was my inspiration:
http://www.apartmenttherapy.com/ny/colortherapy/colortherapy-a-moorish-treillage-080608
He didn't really give too many details on how to do it though.
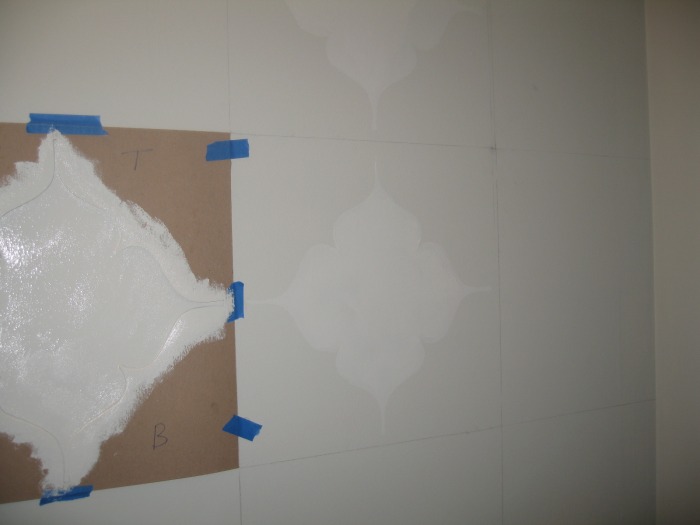
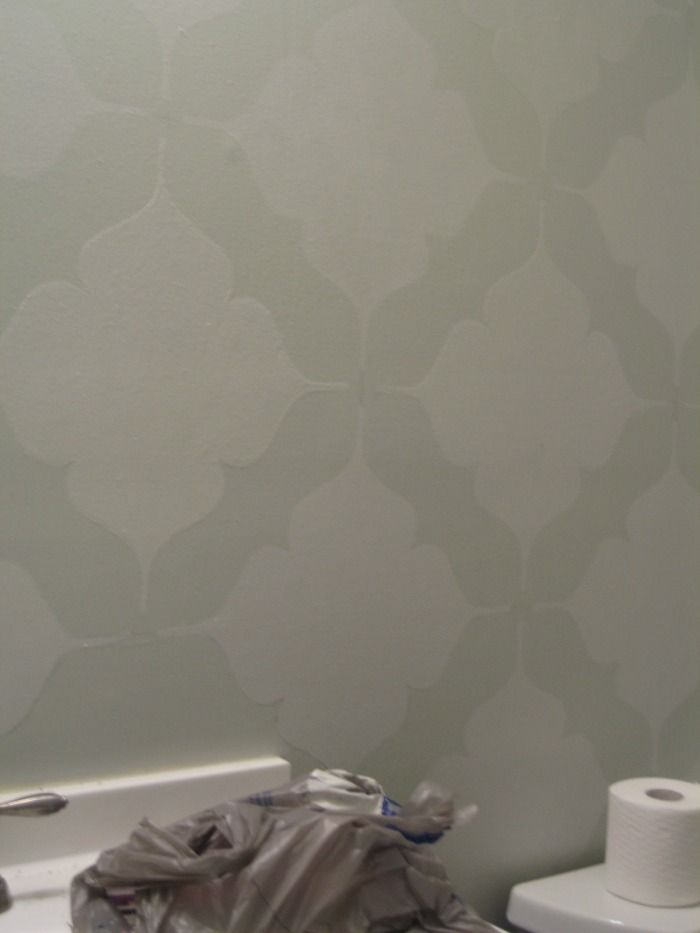
I used flat paint as a base (Martha Stewart/Valspar Bleached Driftwood). For the stenciling, I used semi-gloss of the same color mixed with white. I wasn't planning on using white at all, but the stencil wasn't really visible without it. Luckily, I found some old white paint in my basement.
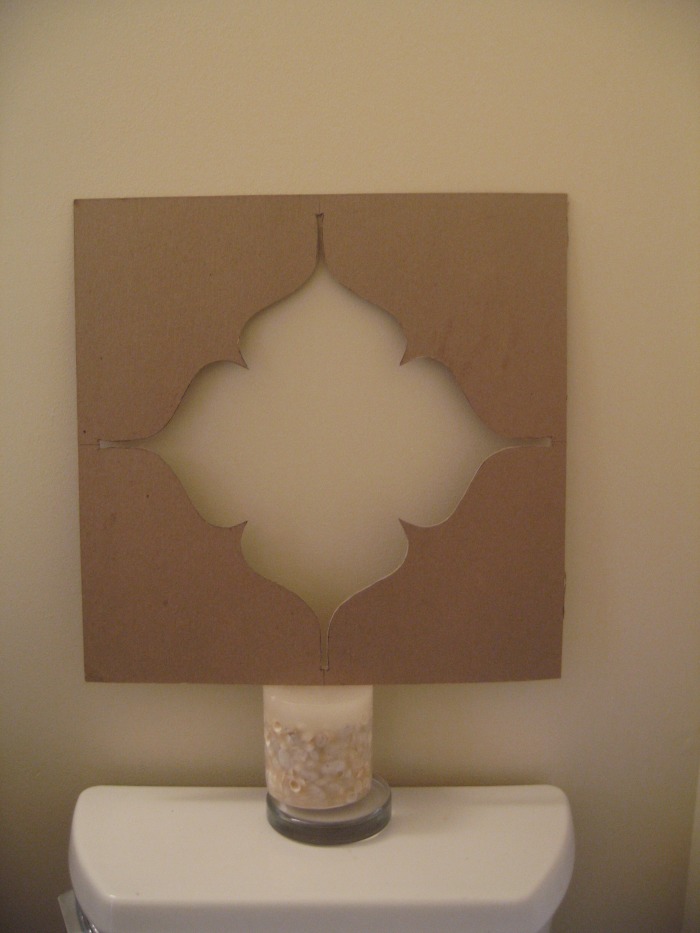
1. I started by creating my stencil. I took a large piece of paper and folded it like a snowflake (folded 2 times, then folded diagonally). I drew an 1/8th of the design on the fold, then opened it up to get the symmetrical design. It took a little practice, especially to get the right size. Once I had the size I was happy with, I took the paper shape and traced it onto a piece of cardboard (the back of a drawing pad). The paper shape was 16-1/2" and I cut the cardboard to be 18" square.
2. I centered the shape in the middle of the cardboard and cut it out with an exacto knife to make my stencil. I marked a "T" and "B" on the stencil (top and bottom) to be sure I kept the stencil in the same direction.
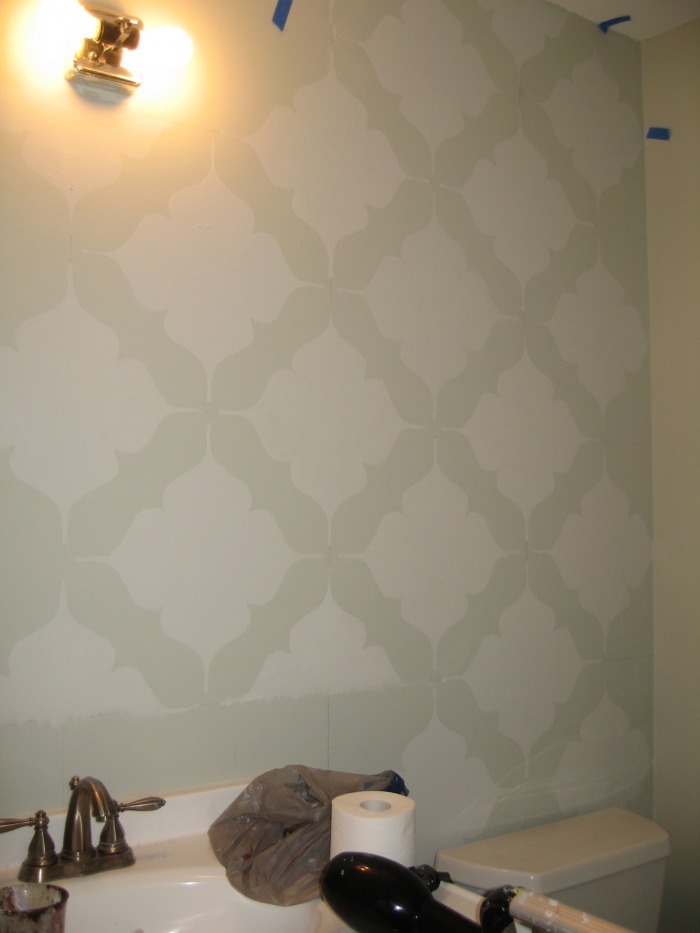
3. I then made a grid of 18" squares on the wall with pencil. I started in the middle, on top, and measured out the grid using a ruler, a triangle, and a level. After I had my grid in place. I taped the stencil in each square and used a pouncing up and down motion with my brush to fill in the space.
4. I also added another stencil in between 4 squares. Since the design was symmetrical, I could line in up with the cross lines as well as visually observe where it should be.
5. The ends of the wall and areas in which I couldn't fit the entire stencil were trickier. I used a few different methods including bending the stencil, tracing the paper tracer and hand-painting them in, and using the cardboard cutout from the stencil (tracing it and then hand-painting).
Click on any picture to enlarge.